Adjust an object with Magic brush
Draw a guide to change an edge or remove a feature, then compare the result.
Magic brush is available in the Create object preview. Use it to adjust the generated drawing before adding the object to your library.
1. Turn on Magic brush
Generate an object and select the wand button labeled Magic brush in the preview's upper-left corner. Draw directly over the preview with your pointer. Your guide appears in red.
2. Show the change you want
Use one clear gesture for each adjustment:
| Your goal | What to draw |
|---|---|
| Remove a feature | A compact back-and-forth scribble over the feature |
| Move an edge inward | A simple line inside the existing edge |
| Extend an edge outward | A simple line outside the existing edge |
| Change several sides | A broad continuous line around the sides you want to reshape |
| Cut one area and extend another | A guide with clear sections inside and outside the current outline |
For example, scribble over a lounger arm to request its removal. For a wider tabletop, draw the new outer edge and join it back to the existing surface.
The red line is an approximate guide. Champagne smooths small wobbles and tries to connect the edited section naturally to the surrounding drawing. A removal scribble selects the whole feature, including its detail lines. Removing a feature on a solid surface fills in the surface behind it.
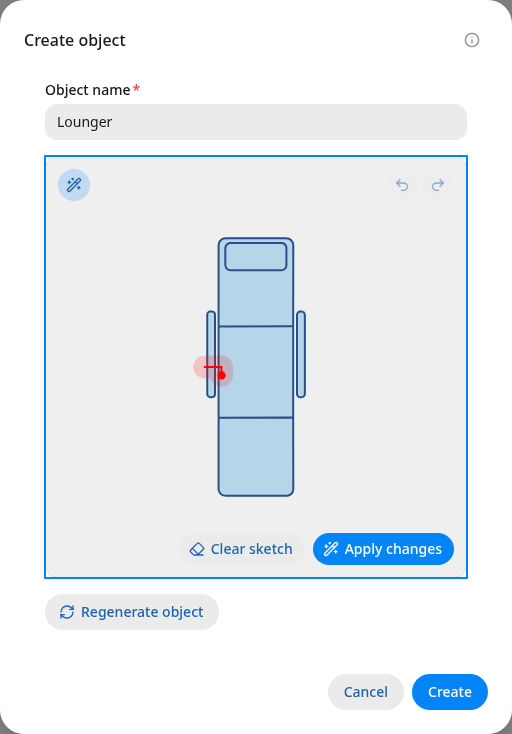
A red guide on the example lounger. Clear sketch lets you redraw the guide; Apply changes submits it.
3. Apply and review
Select Apply changes. Champagne reads the guide, edits the drawing and checks a rendered preview. It may make a correction during that check. The updated artwork appears when this process finishes.
Loading diagram...
Diagram source
flowchart TD
  accTitle: Magic brush workflow
  accDescr: Draw a red guide, apply the change, wait for an edit and preview check, then review or undo the result.
  Guide[Draw a red guide] --> Apply[Choose Apply changes]
  Apply --> Read[Champagne interprets the gesture]
  Read --> Edit[Adjust the shapes]
  Edit --> Check[Check the preview]
  Check --> Result[Show the updated artwork]
  Result --> Review{Keep this version?}
  Review -->|Yes| Create[Continue or choose Create]
  Review -->|Try again| Undo[Choose Undo edit]
  Undo --> Guide
Compare the updated outline with the change you intended. Check neighboring parts, gaps and surface colors as well. Use Undo edit to return to the previous successful version and Redo edit to restore it.
Useful controls
- Clear sketch: remove the red guide and draw another one.
- Cancel editing: stop the current request and keep your current preview.
- Undo edit / Redo edit: move between successful artwork versions.
- Create: accept the current drawing into your library.
Keyboard users can focus the editing area after enabling Magic brush. Press Space to begin a sketch, use the arrow keys to draw, and press Space again to finish. Escape leaves Magic brush.
When the result needs another pass
Apply one small change at a time. Use a compact scribble for removal and a simple continuous line for an edge. Keeping each guide focused makes the intended change easier to interpret.
An unsuccessful edit leaves the current preview available. Retry with a clearer guide or choose Regenerate object to start from a fresh drawing. The optional Classify brush intent control is explained in Settings and help.