# Review applications
Read an application, then accept or reject it.
Source: https://docs.champagne.dev-ukab.fr/en/guide/staff/applications
When someone wants to join your club, they fill in your online [application](/en/guide#application) form. The
**Applications** section lists these applications so your team can read each one and
accept or reject it.
To change the questions of the form itself, see
[Application forms](/en/guide/admins/onboarding-forms).
## 1. See the applications [#1-see-the-applications]
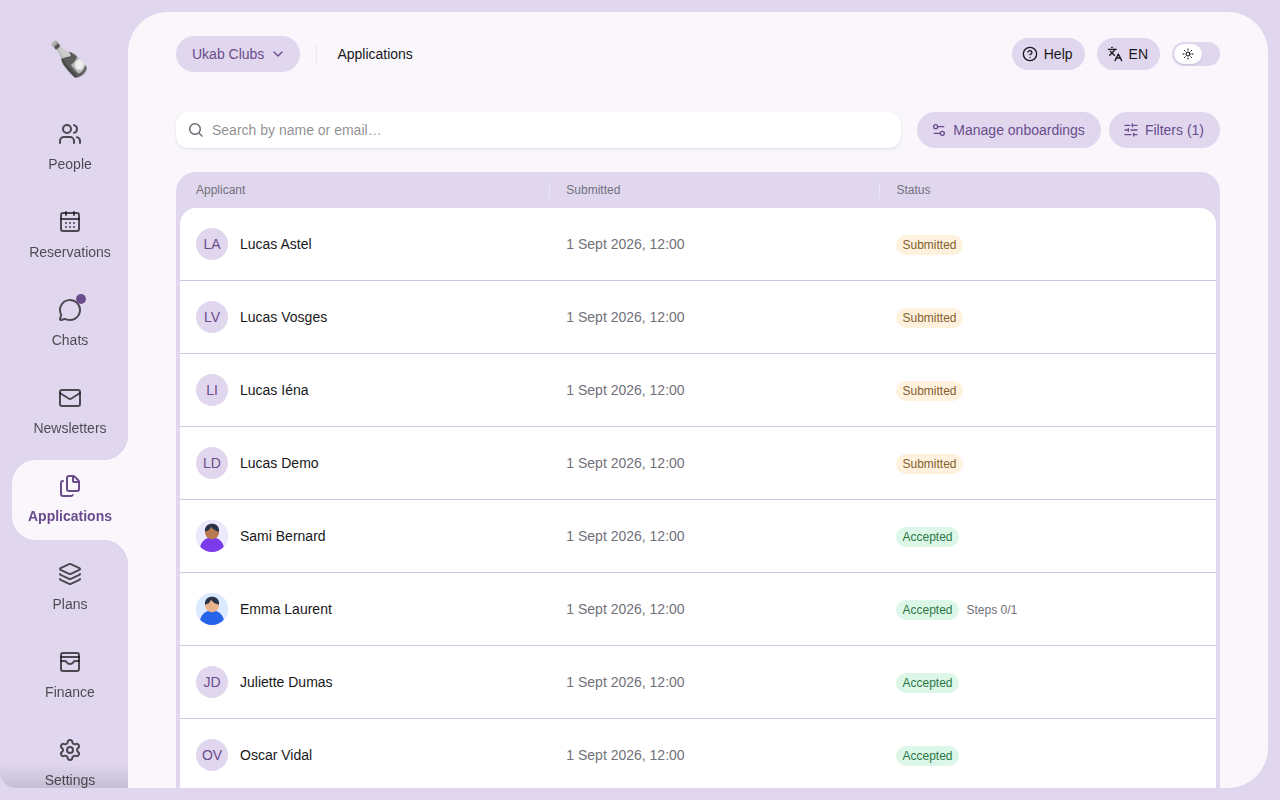
In the left menu, select **Applications**. The list shows each **Applicant**, the date
the application was **Submitted** and its **Status**.
Example applications to Ukab Clubs, waiting or already accepted.
| Status | Meaning |
| ---------------- | --------------------------------------------------------------------------------------------------- |
| **Draft** | The applicant started the form and has not sent it yet. Its date shows **Not submitted**. |
| **Submitted** | The applicant sent the form. It is waiting for a decision. |
| **Under review** | Also waiting for a decision. The list shows it as **Submitted** and the filters count it with them. |
| **Accepted** | Your team accepted the application. |
| **Rejected** | Your team rejected the application. |
A draft whose applicant has not given a name yet is titled **Application in progress**.
An accepted application may also show **Steps**, such as **Steps 0/1**. These are the
steps the new member still has to complete after approval, for example paying their
[plan](/en/guide#plan).
By default, the list shows **Submitted** and **Accepted** applications. Select
**Filters** to choose other statuses or a submission date range, then select **Apply
filters**. Type a name or email address in **Search by name or email…** to find one
applicant. When nothing matches, select **Clear search and filters**.
## 2. Read an application [#2-read-an-application]
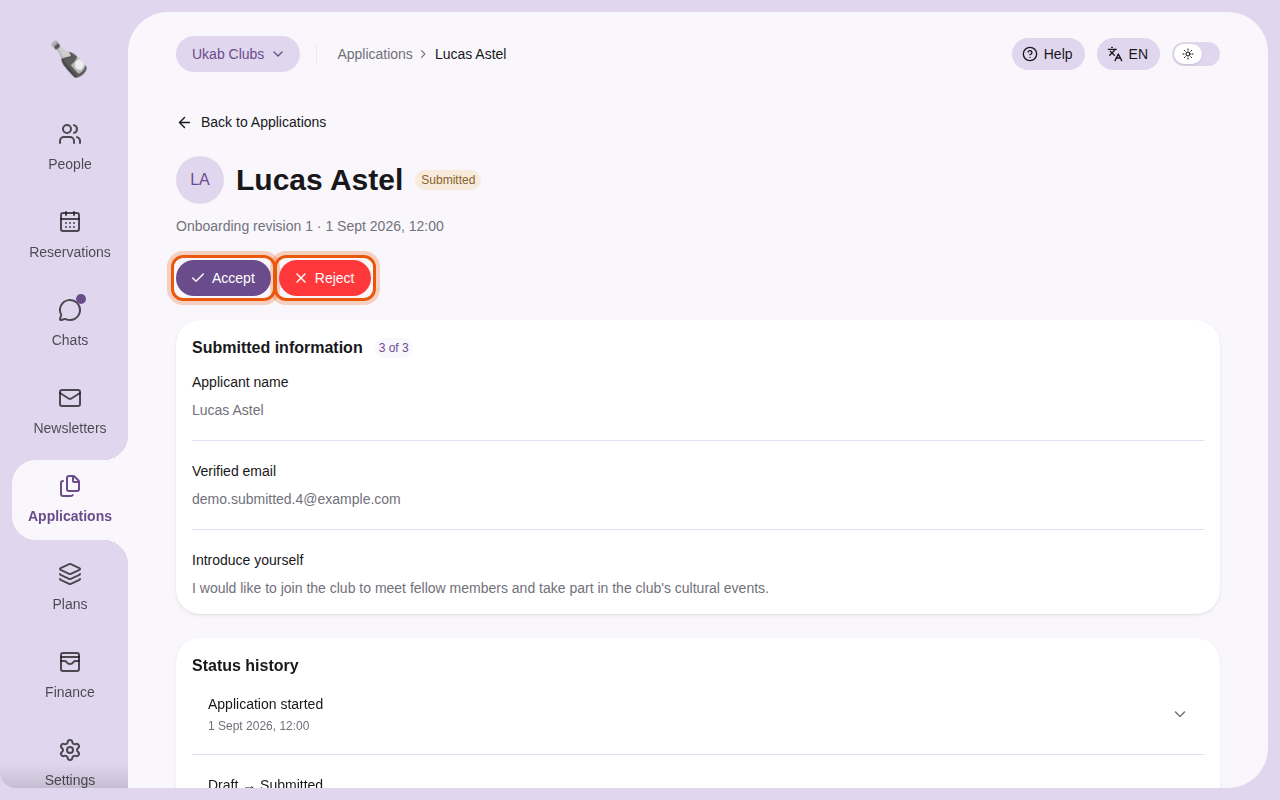
Select an applicant in the list. The page shows their name and status, the **Onboarding
revision** (the version of the form they filled in) and the submission date, then:
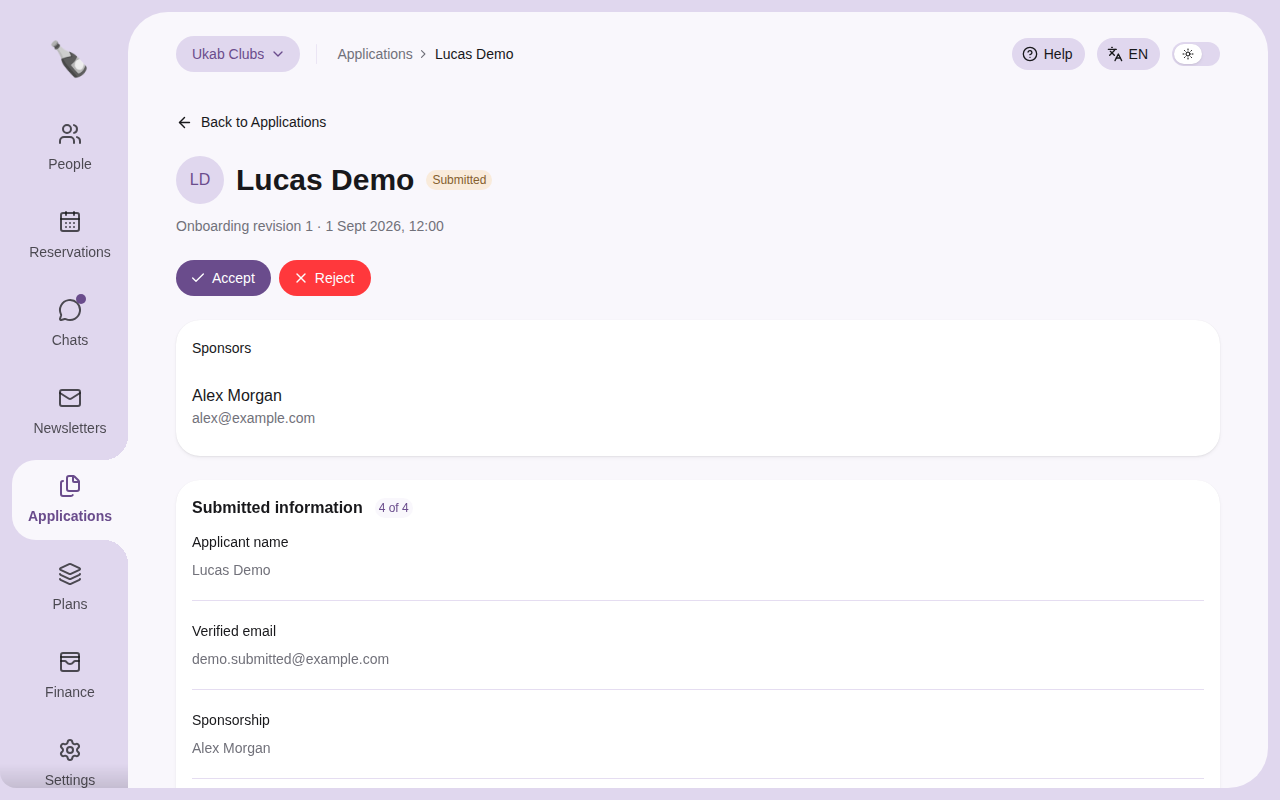
* **Sponsors**, when your form asks for sponsor codes: the members whose code the applicant
used, with a link to their profile, or **No sponsor code has been redeemed yet.**
* **Rejection reason**, for a rejected application with a reason.
* **Submitted information**: each question of your form with the applicant's answer. A question
left empty shows **No answer** when it was optional and the application was sent, and **Not
completed** otherwise. The chip next to the title counts the answered questions. Built-in
questions carry their name in the onboarding editor, such as **Applicant name**, **Applicant
address**, **Plan selection**, **Sponsorship** and **Verified email**. When your form asks for
them before approval, the identity check result and the booked visit also appear here, and the
identity actions below work the same way.
* **After approval**: the steps the applicant completes once accepted, if your form has
any. Each step shows **Waiting for approval** before the decision, **Not completed** after
it, then the answer and its date, or **Payment confirmed** for a payment. An identity step
also shows what Stripe checked: **Document**, **Selfie**, **Date of birth** with the age check,
and **Name**. While the step is the applicant's current one, select **Allow a new attempt** to
let them try again, for example after **Under the minimum age** or **The name does not match the
application**, or **Mark as verified** to complete it yourself. Champagne first asks **Mark the
identity as verified?**, since Stripe did not confirm every check.
* **Status history**: when the application was started, submitted and decided. Select a change
to see who made it, with the reason if any: a team member, **System** for automatic changes,
**Applicant · identity not authenticated** for the applicant, or **Staff · identity not
available** when no name is recorded for the team member who made the change.
* **Email history**: each email sent to the applicant, such as the **Acceptance** or
**Rejection** email or a **Finalization reminder**, with its state: **Sending**, **Accepted by
provider**, **Failed** or **Uncertain**. **Accepted by provider** means the email left
Champagne; it does not confirm it reached the inbox.
* **Text message history**, when your form verifies the applicant's phone, before or after
approval: each code texted to them, marked **Text sent**, **Text delivered** or **Text not
delivered**.
The application of the example applicant Lucas Astel. The controls to use are outlined in
orange.
The example applicant Lucas Demo, who used the sponsor code of Alex Morgan.
## 3. Accept or reject [#3-accept-or-reject]
Select **Accept** or **Reject**. A confirmation window opens. Once an application is
linked to a person in **People**, both buttons disappear and **Open person** takes their
place at the top of the page. An application that is not linked yet shows only the
decision it does not have: **Reject** on an accepted one, **Accept** on a rejected one.
* **Accept**: select **Confirm acceptance**. Champagne creates the person's profile and
sends them an email to continue their registration. A visit they booked while applying is
moved to their profile. An **Open person** button then takes you to their profile in
**People**.
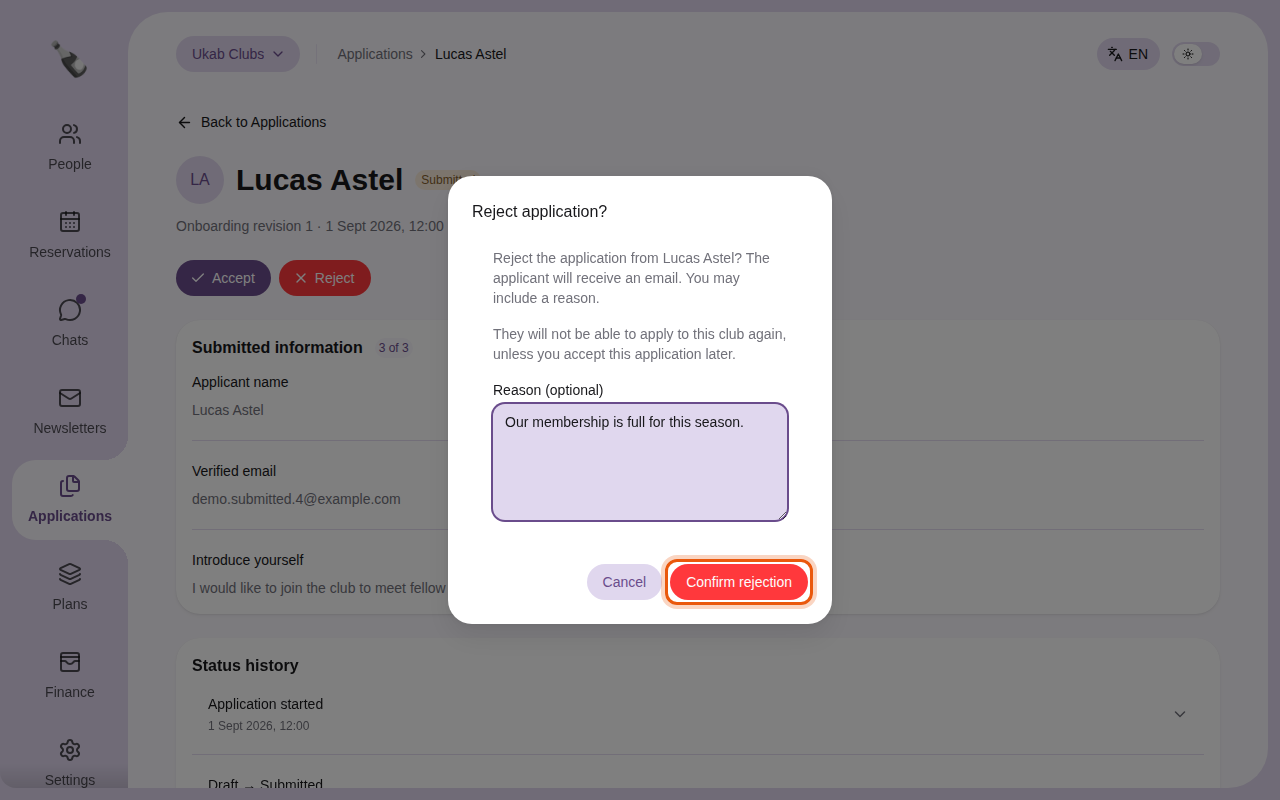
* **Reject**: you may type a **Reason (optional)**, then select **Confirm rejection**. The
applicant receives an email that includes your reason. A visit they booked while applying is
canceled.
Rejecting the example application of Lucas Astel with a short reason.
> A rejected applicant who tries to apply again is asked to contact your club first. If you change
> your mind, open the application and select **Accept**.